Showing posts with label friday favorites. Show all posts

Friday, March 12, 2010

Friday Favorites: Peanut Butter Chocolate Pie

You know how you get invited to things and you know you should bring something?

Or, you get invited and you are asked to bring something?
Confession time: 9 times out of 10 I ran by the grocery store on my way over...or....I showed up empty handed.

Gasp. Horrors.

The issue was that I would rack my brain trying to think of something extra fabulous to make and then run out of time or energy, or I didn't know what other food would be there, so I didn't want to make something that didn't "go".

Until now.

Just a note: if you know me in real life and invite me over, know that I will likely be bringing this.

I don't care if you are allergic to peanuts.

Note #2: I made this yesterday just for you. My blog readers. I had no other event to make this, I just knew it had to make it to one of my Friday Favorites posts.

Be impressed.

What? Nooooo...I didn't do it because I needed an excuse to eat the yummy goodness! Puhlease! What do you people take me for?!

Oh yeah. You're right. I'm a cow. It's cool.

***


1 cup heavy cream
9 pieces of pre-made peanut butter cookie dough*
6 ounces of cream cheese, softened
2/3 cup sugar
2/3 cup brown sugar
1/2 cup peanut butter
1 tbls. vanilla extract
1/2 cup chocolate chips
1 pkg. of reeses' peanut butter cups

*you can make your own dough if you are an overachiever. I might make fun of you though.


1. Heat oven to 350 degrees. Coat a 9 inch pie plate with cooking spray.
2. With an electric mixer, beat cream to stiff peaks. (careful you don't make butter!) Refrigerate.
3. Roll out dough between 2 sheets of wax paper in as big a circle as possible. Remove one of the sheets of wax paper and invert dough into pie plate. Press dough up sides of dish. If dough is sticky and paper difficult to remove, refrigerate for 10-15 minutes.
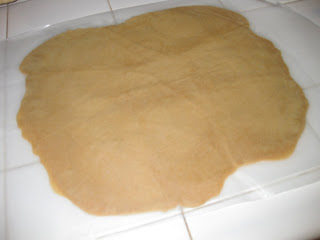


4. Bake for 18-20 minutes. Remove from oven and press down center if puffy. Cool *completely* on a wire rack.

It aint pretty, but who cares? And if you do have friends that care about what your pie crusts look like...you need new friends.

5. In a large bowl, blend cream cheese and both sugars until smooth. Add peanut butter and vanilla, beat until light colored.
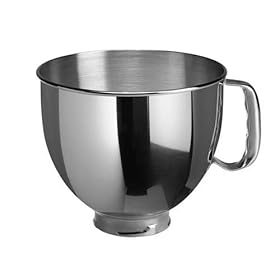
6. Fold in (that's fancy cook speak for "mix in gently") whipped cream until no streaks remain.Notice how I have 2 stand mixer bowls? Be jealous.

So I burned my crust a little. Sue me. Still tasted good going down my gullet.

7. Spoon peanut butter filling into cooled crust. Refrigerate at least one hour.
8. Chop up peanut butter cups and sprinkle on top of pie. Melt chocolate chips in a glass bowl in microwave. Drizzle (or pour, whichever) over pie.

Can't you just *taste* it??? mmmmmmm....

9. Serve in small slices because this is really rich. Or be a cow like me and serve yourself a giant slice and eat it until your tummy aches.


Surprise your family. Make this tonight. I mean really, why not?!?!

And without further ado, the winner of the Monkey Foot Designs Wetbag is:

CARRIE H.!!!

Happy FRIDAY!!!


(p.s. notice how crappy my pictures are? i'm pretty sure it's a sign i need a dslr...just sayin'...)

Friday, March 5, 2010

Friday Favorites: Burt's Bees


I *heart* Burt.

And all his crazy bees too.

I have been loving and buying Burt's Bees products...WAY before it was cool to do.

Back when you couldn't walk into Target or WalMart and buy it.

Back when only health food stores carried his stuff.

You know why? Because I'm a trail blazer like that.

Watch out.

It all started a few years ago when I just got sick. and. tired. of smelling like Petunias, Whispering Jasmine, Strawberry Cream, or Plumeria.

Look, those are all great, but at some point I just wanted to smell like...*LOTION*.

And frankly, some of the brands were overpowering...or if I put them on my legs too soon after shaving, it stung....which caused little red bumps...which is completely COUNTER PRODUCTIVE to why I even bothered to shave in the first place!

If I knew I was going to have to wear pants anyway, I'd have gone Beast Woman and saved myself the trouble.

Don't lie. You know you do it too.

Enter Burt and his Bees.


It started with the lotion.

And then the (mild) obsession with the lip balm.

And then the hand wash.


And then the baby shampoo.

Baby lotion.

Diaper cream.

Men's shave oil.

Men's after shave.

Men's shave cream.

Cuticle cream.

Foot cream.

Pretty much, you name it...you'll find it in my house.

Burt's Bees fanatics really.


I would bet there are close to 32 tubes of lip balm strewn throughout my house.

No lie.

I just love that it doesn't smell like a funeral parlor full of flowers and I do love that it's all at least 90% natural.

Particularly for my babies.

I get all weird and granola crunchy when it comes to my kids.

No Johnson's & Johnson's here.

No sir.

Only Mr. Burt.

And his bees.

Do you love Burt like I do? What's your favorite product?

How many tubes of lip balm do you think are floating around your house right now?

And the winner of the CitySlips is:

RACHEL!!!

Congrats!

Friday, February 26, 2010

Friday Favorites: KitchenAid Stand Mixer


I will admit that when someone tells me that they don't already own one of these things...

...I am shocked...and a bit appalled.

I mean, how can you *not* have a stand mixer???

How do you make it through LIFE????

You might think I'm being dramatic, but...um, I'm pretty serious.

"But Jeannett, my little handheld mixer works just fine..."

Sure it does honey.

Look, I can't exactly explain the amazingness of being able to WALK AWAY from your mixing job...

...or how *awesome* it is to be able to keep spooning ingredients in without having to set that silly hand mixer down....

...or how *efficient* it is to not have to turn it off and on and not spray brownie batter all over your cupboards because you forgot to wait for it to stop spinning before pulling it out of the bowl...oh wait, maybe that's just me...

The best way I can describe it for you is this:

For the better part of my life I lived in houses that did NOT have master bedrooms.

I never understood the fascination...I mean, really...how hard is it to walk 8 feet down a hallway to a bathroom, right?

UNTIL...we moved into an apartment that HAD a master bedroom.

And then...I understood.

You can certainly go your whole life without ever having a master bedroom and be perfectly fine.

You can certainly go your whole life without having a dishwasher too.

BUT WHY WOULD YOU????

Once you experience the convenience...it'd be mighty hard to go back.

And so it is with a stand mixer.

I still have a little handheld that I hold onto for some reason. But honestly, it has a layer of dust on it. I'm not even sure I know where both of the little whisk doo-hickies are.

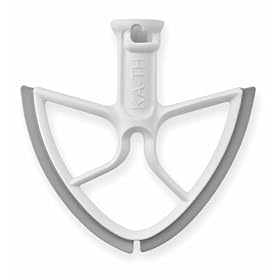
As a side note, if you have a stand mixer already...do yourself a favor and get a second bowl and a second mixing blade. SO nice to not have to wash it all up when you are making more than one thing.

For Christmas, Andy got me this:


Rad. He knows the way to my heart.

Kitchen supplies.

I love my mixer. She makes me happy. (While I love my black one, I secretly covet this one. It has a GLASS bowl, people! How cool is that???!!!) Every once in a while I will look over at her sitting in the corner and think: "hmmm, it's been a couple of weeks since I used you...you look lonely...I should make something..."

Again, not kidding.

Clearly I have issues.

I'm good with it.

Do you have a mixer? What color is it?
Do you have a love affair with it like I do?


Lastly, the winner of the Figgy & Wink Giveaway is:

Lesli!!!!


Happy Friday!!!!

Friday, February 19, 2010

Friday Favorites: Swiffer Vac


(Just to start, I want to say that I am in no way being compensated for this review. Bummer.)

Okay, so a lot of you seemed pretty shocked that I Swiffer my house every day.

See, when you have TWO long haired dogs...each of whom weigh over 80 pounds...well, it's not just my neurosis taking over.

The amount of hair is staggering.

I'm actually shocked that the dogs aren't bald by now.

I have no idea where it all comes from, but what I do know is that I find fluffy tumbleweeds of fur blowing across my wood floors.

Too often.

It's disgusting.

The Swiffer Vac is my BFF.

It sucks up those pesky hairs in an instant. And really, it only takes me about 10 minutes to do my entire first floor. Not to mention, that there is almost always a baby in the non-swiffering arm. Easy peasy.


I use the dry cloths for everyday use. And I have a tub of the wet cloths for times when I feel like the floor could use a little cleaning...but I'm too lazy to *actually* clean it with floor cleaner and a microfiber mop doohicky.

I buy the refills at Costco...SO much cheaper...but I think I might even cut up old rags to the right size and try that when I run out. With as often as I Swiffer (since when did that become a VERB???)...it might be a good way to save some money.

Cons?
It's a bit expensive. ($28 at Target...but you can get a $5 coupon at their website).
The refills can get pricey depending on how quickly you burn through them.
The rechargeable battery loses its umph after a while...in fact, this is my second Swiffer Vac...the first one lasted about 3.5 years before I had to toss it out and replace it. The battery just wouldn't hold the charge anymore. So sad.

Anyway, if you have wood floors, a regular Swiffer is lame. Buy the vacuum one.

And while you are at it, tell Swiffer to pay me for the glowing review.

Bums.

***

The Winner of the Material Gal Fabric Bundle is:

Liz!!!

Happy Friday!!!

Friday, February 12, 2010

Friday Favorites: Best {ever} Sugar Cookies


I'm a sugar cookie snob.

It must be sugary and sweet.

It must be crispy...but only on the edges.

It must be soft...but only in the center.

BEHOLD!

My all-time fave sugar cookie recipe:

Before you begin, it is of *utmost* importance that you have the right sous-chefs. Sugar cookie making is tricky business without the right help.


2 c. all purpose flour
1 tsp. baking powder
1/2 tsp. salt
2 sticks of butter, softened
1 c. granulated sugar, plus extra for rolling
1 egg
2 tsp. vanilla extract

1. Preheat oven to 375. Whisk together flour, baking powder & salt.
2. Cream butter and sugar using an electric or stand mixer. (and if you don't have a stand mixer by now...we. need. to. talk.)
3. Add egg & vanilla. Add dry ingredients from step 1.
4. Roll dough into little balls. Roll the balls in the extra sugar you have set aside (a cereal bowl works well).
5. Place your sugared balls (ok, kids...keep the jokes clean) on a baking sheet. Squish them down with the bottom of a glass cup. You may need to dip the bottom of the cup in sugar to keep it from sticking to the dough.
6. ***SPRINKLES***


7. Bake 10-11 minutes until golden brown.
8. Lick the dough right off the mixer blade...even if you know that your mother-in-law is having an ab.so.lute. COW right now...can you hear it???..."that's how you get salmonella!!!" :)


9. Eat in horrifying amounts.

Especially good dunked in hot coffee.

Yeah, for breakfast...before the kids get up of course. :)

(oh, and these are too sticky for cutting shapes with cookie cutters so don't try it.)

The winner of the Less Ordinary Designs Giveaway is:

Erin S.!!!

HAPPY FRIDAY!!!

Friday, February 5, 2010

Friday Favorites: Bumbo Chairs

I did a post on the Bumbo back when Henry was a baby. At the time, I liked it, but it wasn't something I would have considered a necessity.

But let's face it. You hold your first baby an awful lot.

You just *can*.

So, having yet another version of a baby chair is sorta like dipping a chocolate chip cookie in hot fudge. It can be too much a good thing.

Fast forward to baby #2...

...or in my case, babies #2 and #3.

Being able to set your baby down is a MUST.

Twin mamas feel this more accutely.

Regardless, I am loving our Bumbos.

They have such a small footprint that they can be used anywhere.

And for anything.

Sitting.


Eating.


My new favorite use for our Bumbo:


Some moms like to give their babies long, luxurious baths.

They bond.

They giggle.

Me?

Notsomuch.

In. Shampoo. Rinse. Out. Done.

I pretty much only bathe my kids as insurance against them being the stinky kid in class.

Come on, you all know you had that kid in class.

You probably even remember his name all these years later.

And yes, it was probably a him...because boys are gross.

I can say that because I have one.

Anyway, the point is that my Bumbos are rad.

I love them and I use them multiple times a day.

But buy it on Craigslist. There's no need to pay full price for molded foam.

Oh, and the winner of the LilaFrances giveaway is:

NatureManipulated!

If you didn't win, don't worry, more giveaways to come!

Friday, January 29, 2010

Friday Favorites: Healthy Berry Crisp

There's this great, TOTALLY out of the way little restaurant in Morro Bay called the Bayside Cafe. When we lived in SLO, we drove out there *regularly* for no reason other than to have their famous Berry Crisps.

I know we're not the only ones who loved these things...you seriously would have to let the waitress know at the beginning of your meal that you intended to have them for dessert and to reserve them...or you risked them running out!

Over the years, we have since moved and it's now about 50 miles to our little Cafe.

So sad.

I've tried a bunch of different recipes...and after many tries and lots of fiddling, I think I got it. I haven't done a side by side comparison, but these are DARN good.

4 cups berries*
4 tbls. sugar
2 cups flour
2 cups oats
1 1/2 cups brown sugar
1 cup softened butter
1 tsp. cinammon
1/2 tsp. nutmeg
Whipping Cream

*(I usually buy the Marion Berries at the grocery store, but you can use any kind of dark berry...black, boysen, etc. Fresh is great if they are in season, but frozen works well too.)

Preheat oven to 350 degrees.

1. Mix berries and sugar in a bowl. (You don't have to defrost the berries if you don't want to...)
2. In a separate bowl, combine remaining ingredients (except cream). You'll probably have to use your hands...the mixture should be crumbly.


3. Divide up the berries evenly into individual serving, oven safe dishes. You can use ramekins, bowls...those mini loaf dishes from Michael's are a perfect size...


4. Cover berries with oat mixture. GENEROUSLY. Think you put enough on? Put some more on there. Really. It sort of settles down into the cooked berries so you want to be sure there is enough to have a decent amount of topping. (Depending on how big your dishes are, you may have leftover so don't think you have to use all of the topping).


5. Bake 30-35 minutes.
6. Serve warm.


Okay, now this is the REALLY, REALLY, REALLY important part.

Vital.

The crisp will not be nearly half as good if you don't do this:


Before you bite into the yummy berry goodness...you have to pour some whipping cream on top.

Keep that cream handy.

You will re-apply.

Trust me.

Healthy?

Oh, that's right...

I put that in the title because I figure it's still January, so some of you may still be in New Year's Resolution mode...

::cough::lame::cough::

Well, let's see...berries are chock full of antioxidants, and they are a fruit...the oats are good for your cholesterol...and you got yourself some dairy in there too...

That screams healthy if you ask me...

(this is also coming from the girl who goes around wearing yoga pants and running shoes convinced that her body is somehow tricked into burning calories as a result...because it's not like I actually DO yoga or go running...pshaw....!)


***And dear readers, be sure to tune in on Monday...I have a surprise for y'all!!!***