
You know how you get invited to things and you know you should bring something?
Or, you get invited and you are asked to bring something?
Confession time: 9 times out of 10 I ran by the grocery store on my way over...or....I showed up empty handed.
Gasp. Horrors.
The issue was that I would rack my brain trying to think of something extra fabulous to make and then run out of time or energy, or I didn't know what other food would be there, so I didn't want to make something that didn't "go".
Until now.
Just a note: if you know me in real life and invite me over, know that I will likely be bringing this.
I don't care if you are allergic to peanuts.
Note #2: I made this yesterday just for you. My blog readers. I had no other event to make this, I just knew it had to make it to one of my Friday Favorites posts.
Be impressed.
What? Nooooo...I didn't do it because I needed an excuse to eat the yummy goodness! Puhlease! What do you people take me for?!
Oh yeah. You're right. I'm a cow. It's cool.
***

1 cup heavy cream
9 pieces of pre-made peanut butter cookie dough*
6 ounces of cream cheese, softened
2/3 cup sugar
2/3 cup brown sugar
1/2 cup peanut butter
1 tbls. vanilla extract
1/2 cup chocolate chips
1 pkg. of reeses' peanut butter cups
*you can make your own dough if you are an overachiever. I might make fun of you though.
1. Heat oven to 350 degrees. Coat a 9 inch pie plate with cooking spray.
2. With an electric mixer, beat cream to stiff peaks. (careful you don't make butter!) Refrigerate.
3. Roll out dough between 2 sheets of wax paper in as big a circle as possible. Remove one of the sheets of wax paper and invert dough into pie plate. Press dough up sides of dish. If dough is sticky and paper difficult to remove, refrigerate for 10-15 minutes.
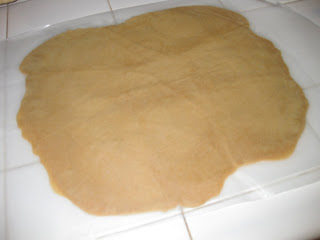

4. Bake for 18-20 minutes. Remove from oven and press down center if puffy. Cool *completely* on a wire rack.
 It aint pretty, but who cares? And if you do have friends that care about what your pie crusts look like...you need new friends.
5. In a large bowl, blend cream cheese and both sugars until smooth. Add peanut butter and vanilla, beat until light colored.
6. Fold in (that's fancy cook speak for "mix in gently") whipped cream until no streaks remain. Notice how I have 2 stand mixer bowls? Be jealous.
 So I burned my crust a little. Sue me. Still tasted good going down my gullet.
7. Spoon peanut butter filling into cooled crust. Refrigerate at least one hour.
8. Chop up peanut butter cups and sprinkle on top of pie. Melt chocolate chips in a glass bowl in microwave. Drizzle (or pour, whichever) over pie.
 Can't you just *taste* it??? mmmmmmm....
9. Serve in small slices because this is really rich. Or be a cow like me and serve yourself a giant slice and eat it until your tummy aches.

Surprise your family. Make this tonight. I mean really, why not?!?!
And without further ado, the winner of the Monkey Foot Designs Wetbag is:
CARRIE H.!!!
Happy FRIDAY!!!
(p.s. notice how crappy my pictures are? i'm pretty sure it's a sign i need a dslr...just sayin'...)
Or, you get invited and you are asked to bring something?
Confession time: 9 times out of 10 I ran by the grocery store on my way over...or....I showed up empty handed.
Gasp. Horrors.
The issue was that I would rack my brain trying to think of something extra fabulous to make and then run out of time or energy, or I didn't know what other food would be there, so I didn't want to make something that didn't "go".
Until now.
Just a note: if you know me in real life and invite me over, know that I will likely be bringing this.
I don't care if you are allergic to peanuts.
Note #2: I made this yesterday just for you. My blog readers. I had no other event to make this, I just knew it had to make it to one of my Friday Favorites posts.
Be impressed.
What? Nooooo...I didn't do it because I needed an excuse to eat the yummy goodness! Puhlease! What do you people take me for?!
Oh yeah. You're right. I'm a cow. It's cool.
***

1 cup heavy cream
9 pieces of pre-made peanut butter cookie dough*
6 ounces of cream cheese, softened
2/3 cup sugar
2/3 cup brown sugar
1/2 cup peanut butter
1 tbls. vanilla extract
1/2 cup chocolate chips
1 pkg. of reeses' peanut butter cups
*you can make your own dough if you are an overachiever. I might make fun of you though.
1. Heat oven to 350 degrees. Coat a 9 inch pie plate with cooking spray.
2. With an electric mixer, beat cream to stiff peaks. (careful you don't make butter!) Refrigerate.
3. Roll out dough between 2 sheets of wax paper in as big a circle as possible. Remove one of the sheets of wax paper and invert dough into pie plate. Press dough up sides of dish. If dough is sticky and paper difficult to remove, refrigerate for 10-15 minutes.


4. Bake for 18-20 minutes. Remove from oven and press down center if puffy. Cool *completely* on a wire rack.
 It aint pretty, but who cares? And if you do have friends that care about what your pie crusts look like...you need new friends.
5. In a large bowl, blend cream cheese and both sugars until smooth. Add peanut butter and vanilla, beat until light colored.
6. Fold in (that's fancy cook speak for "mix in gently") whipped cream until no streaks remain.
 Notice how I have 2 stand mixer bowls? Be jealous.
 So I burned my crust a little. Sue me. Still tasted good going down my gullet.
7. Spoon peanut butter filling into cooled crust. Refrigerate at least one hour.
8. Chop up peanut butter cups and sprinkle on top of pie. Melt chocolate chips in a glass bowl in microwave. Drizzle (or pour, whichever) over pie.
 Can't you just *taste* it??? mmmmmmm....
9. Serve in small slices because this is really rich. Or be a cow like me and serve yourself a giant slice and eat it until your tummy aches.

Surprise your family. Make this tonight. I mean really, why not?!?!
And without further ado, the winner of the Monkey Foot Designs Wetbag is:
CARRIE H.!!!
Happy FRIDAY!!!
(p.s. notice how crappy my pictures are? i'm pretty sure it's a sign i need a dslr...just sayin'...)